
You line up a sunset portrait at Santa Monica, tap the shutter, and get a white streak skidding across the frame instead of that clean blue water. Beach glare sneaks in fast because sun, sand, and waves all bounce light at you from different angles. If you shift your position, time the shot, and use a few simple tools, you can keep highlights crisp and faces clear. The easiest fixes start before you even lift the camera.
Key Takeaways
- Shoot during golden hour or under light cloud cover to get softer light and less glare on water and skin.
- Keep the sun just outside the frame or about 45 degrees behind your shoulder to reduce flare and washed-out contrast.
- Use a circular polarizer and rotate it until reflections drop, especially when the sun is to the side.
- Lower ISO to 100, use fast shutter speeds, and slightly underexpose to protect bright sand and water highlights.
- Move a few steps, change height, or place subjects in shade so reflections shift away from the lens.
Choose the Best Time to Avoid Beach Glare
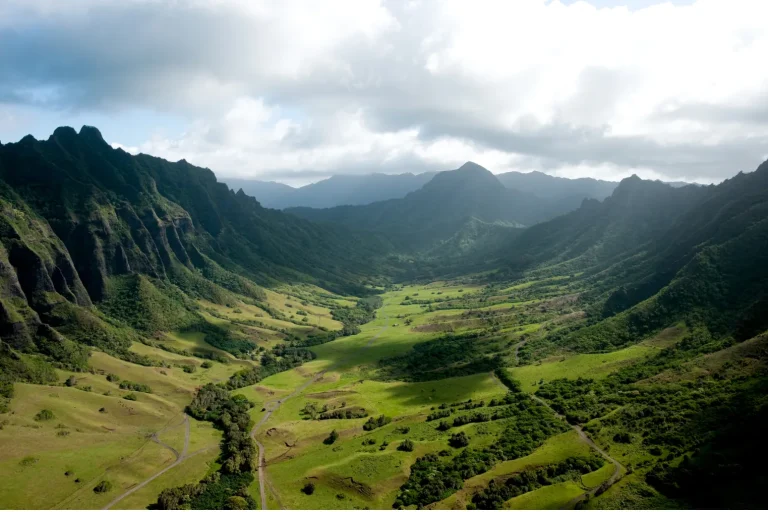
Usually, the easiest way to tame beach glare is to shoot when the sun sits low and gentle, about 30 to 90 minutes after sunrise or before sunset. Those golden hours give you softer light and calmer highlights, so sand keeps its texture and waves hold their sparkle. Skip mid-day when you can, because the high sun turns water into a mirror and pushes contrast too hard. If you must shoot then, try a polarizing filter to cut surface glare and keep color rich. Overcast or partly cloudy skies help too, diffusing the light so you can shoot more freely. For vivid blue water at mid-day, climb higher, angle your view, and let sunlight slip below the surface instead of bouncing straight back up. On Oahu, the best time of day for beach photos is often that same golden-light window, when calmer seas and softer sun make glare easier to manage.
Keep Direct Sun Off the Lens
Keep direct sun off your lens and you’ll cut a surprising amount of beach glare before it starts. Slip on a lens hood, or make a quick phone hood, then shift a few steps or tilt your angle until the sun sits just outside the frame. You’ll see richer color, cleaner contrast, and fewer washed-out streaks across all that bright sand and water. For even better results, check your iPhone camera settings before shooting Hawaii scenery so highlights stay controlled in bright tropical light.
Use Lens Hood
Slip a lens hood onto your camera before you step onto the sand, and you’ll cut down the stray sunlight that causes flare and drains contrast from beach scenes. A Lens Hood acts like a visor for your glass, helping you reduce glare when the sun sits off to the side. Match the hood to your focal length, too. Petal shapes suit wide views, while cylindrical hoods fit telephoto lenses without clipping corners. Keep it on as you walk. It shields the front element from blowing sand, sticky salt spray, and the occasional finger poke during a windy stroll. If you shoot with a phone or compact camera, try a clip-on hood, or make a quick shade with a card. Your colors will stay richer and cleaner. This is especially useful during an Oahu Circle Island Tour, where bright sun, ocean reflections, and frequent outdoor stops can make glare harder to control.
Reposition Your Angle
Shift your stance before you press the shutter, and you’ll tame a lot of beach glare fast. Rotate your body or walk a few feet so the sun sits behind your shoulder, about 45 degrees off axis. That angle keeps rays from striking the lens and cuts sun glare fast. Watch shadows stretching across the sand. They reveal where the sun is, so you can point the camera smarter. Try lowering your camera, or place the sun just outside the frame, tucked behind a subject or the horizon. At midday, climb a rock or overlook so water reflections bounce away from your lens. If you need rim light, nudge left or right until flare spots vanish. At Makapuu Lookout, sunrise positioning can make it easier to keep direct sun off the lens while still capturing bright ocean color. Then fine tune shutter speed for the scene.
Use a Polarizer to Cut Water Glare
Twist a circular polarizing filter onto your lens, then rotate it while you watch the water, because the glare can fade right in front of you like someone lowered a shiny curtain. You’ll see reflected light weaken most when the sun sits about 90 degrees from where you’re shooting. On an Oahu circle island tour, some of the best photo stops along the coast are ideal places to test this effect on bright ocean water.
| When | What you’ll notice | What to do |
|---|---|---|
| Side sun | Glare drops fast | Rotate the polarizer |
| High noon | Less change on water | Crouch lower or wait |
| Wide lens | Dark corners or patchy sky | Check edges carefully |
A polarizer also eats about two stops of light, so you may need a slower shutter speed. Remove it if you want glossy, mirror-calm reflections, especially when a calm tide turns the shoreline into a silver postcard after sunrise.
Adjust Exposure to Control Beach Glare
To tame beach glare, you can lower overall exposure so bright sand and sunlit water don’t turn into blank white patches. You’ll also get cleaner highlights when you raise your shutter speed, especially under that hard noon sun that makes everything shimmer. Then narrow your aperture to hold back extra light and keep more of the scene crisp, from salty footprints to the sparkling edge of the surf. At Waimanalo Beach, the bright shoreline on Oahu’s east coast is a good reminder of how reflective sand and water can quickly push highlights too far.
Lower Overall Exposure
When the beach looks almost too bright to be real, pull your exposure down by one or two stops so the sand stays textured and the water keeps its sparkle instead of turning into a white blur. To reduce exposure without losing your subject, meter for skin, or lock exposure there, then keep ISO at its native low setting. These GoPro tips also work well on Oahu tours where bright sand and tropical sun can easily overwhelm your highlights. If glare still bites, try:
- Dialing in -1 to -2 EV.
- Closing the aperture toward f/8 or f/11.
- Using a faster shutter speed instead of longer exposures.
These small shifts hold detail in shells, foam, and sunlit faces. Your camera stops chasing bright sand, and you get richer color and beach scenes that look sun-soaked, not scorched, even at noisy noon tide.
Increase Shutter Speed
Crank your shutter speed up, and the beach calms down fast. Start around 1/1000 to 1/2000 second in harsh sun so less light hits your sensor and glare from water and wet sand eases up. Start your camera prep before stepping onto the sand, much like motion sickness tips help travelers stay comfortable before Oahu bus tours begin. Use Sunny 16 as your baseline, then go 2 to 4 stops faster when reflections get feisty. For portraits, a fast shutter speed lets you keep exposure clean in direct sun while the background still sparkles. Speeds above 1/500 also help you freeze bright specular highlights from splashes before they turn into ugly white blots. You’ll hear the surf and see cleaner skin tones under that fierce noon light today.
| Scene | Feeling | Speed |
|---|---|---|
| Wet sand flashes | Relief | 1/1000 |
| Splashing wave | Control | 1/2000 |
Narrow The Aperture
A smaller aperture gives you another clean way to tame that hard beach shine. Set a narrow aperture around f/8 to f/16, and you cut the light hitting your lens. That helps hold detail in bright sand and flashing water, so glare doesn’t eat the scene.
- Try f/11 at ISO 100 and use a shutter speed near 1/125 to 1/250.
- Use the extra depth of field to keep shell patterns sharp and distant waves clear.
- If you push to f/16 or f/22, watch for softness from diffraction.
Keep ISO low, around 100 to 200. Add a circular polarizer and a slightly faster shutter speed, even 1/500 to 1/2000, for richer blues and calmer highlights. Your camera won’t squint, but it helps on glaring noon walks. If you’re shooting near the shoreline in Hawaii, check beach conditions first and choose a lifeguarded beach whenever possible.
Use Manual Settings for Consistent Results
Because beach light shifts fast off water and pale sand, manual mode gives you a steadier grip on the scene. Start with ISO 50-100 so you can hold bright highlights in check and use a fast shutter speed, 1/1000-1/2000s if the sun is fierce. For portraits, try f/3.5-f/5.6 with that quick exposure. For wider beach views, move to f/8-f/11 and keep the shutter speed high enough to protect sparkle on waves. Meter for your subject with spot or center-weighted metering, then lock your settings in manual mode. On Oahu, weather by area can shift noticeably around the island, so recheck glare and exposure when moving between beaches. If you’re backlit, nudge exposure up 0.3-1.0EV. Add a circular polarizer and tiny aperture shifts when glare fights back. Even with fill light, your frames stay consistent as gulls heckle overhead and footprints vanish in the wash.
Position Your Subject to Avoid Face Glare
Start with a simple turn of the body and watch the glare calm down. On the beach, you can position your subject so the sun lights the face evenly instead of bouncing hot spots from water or white sand straight onto skin. Turn the face a few degrees off center and ask for a slight chin dip. That tiny move cuts shine on sunscreen and wet cheeks.
A small turn, a slight chin dip, and beach glare stops stealing attention from the face.
Try this:
- Face them toward the sun or just off it.
- Keep bright reflections behind your camera.
- If you backlight hair, raise exposure about +1/3 to +1 stop so the face doesn’t sink into shadow.
At Laniakea Turtle Beach, calm moments can make it easier to spot and control glare before you take the shot.
You’ll keep detail, keep sparkle, and avoid that greasy forehead glow nobody requested before the waves steal attention anyway.
Use Sand and Shade to Soften Light
Using the beach itself as a light tool can make portraits look instantly calmer. Put your subject with their back to the sun, then let bright sand act like a giant natural reflector. It bounces soft light into the face, lifts shadows, and keeps the look easy instead of shiny. White sand can add extra light fast, so lower your exposure or raise shutter speed to protect skin tones and pale clothing.
At noon, slide your subject into shade from a dune, umbrella, or beach café wall. Meter for the person, not the blazing background. If shade is scarce, hold a white or silver reflector close for the same fill. With kids, a step into patchy shade can stop squinting and smooth light evenly. If you’re shooting during an Oahu Circle Island Tour, pack sunglasses and a hat so you can see glare patterns clearly and position people more comfortably in bright beach light.
Change Angles When Glare Won’t Go Away
When soft sand and open shade still can’t tame the shine, change your angle instead of fighting the beach. Tiny moves can make a loud difference on water and skin.
- Step left or right 10 to 30 degrees. That shifts the camera, sun, and reflection, and polarizing effects often improve fast.
- Crouch low or rise a foot or two. A new angle can turn harsh highlights into calmer midtones.
- Ask your subject to turn their shoulders, or walk 5 to 20 meters from shore. You’ll keep bright rim light while dodging frontal glare.
If it still flashes back, tip the lens so the sun hides behind the frame’s top edge, a dune, or even a stubborn umbrella during the windy, wave-hissing part of afternoon. On an Oahu outing like the Makapuu Lookout, shifting your position can also help tame reflective ocean glare while keeping the coastline bright and detailed.
Use Beach Glare as a Creative Effect
Lean into the glare and the beach can give you more than problems to solve. During golden hour, try shooting toward the sun for warm rim light and gentle flare. Let a cloud edge, your subject’s shoulder, or even your hand hide part of the sun. You’ll get streaks and starbursts while keeping detail in sand and skin.
Pair backlight with f/2.8 to f/4 and a quicker shutter speed, around 1/500 to 1/2000s, for glowing hair and soft sparkles on water. At noon, remove the polarizer and use a wide-angle lens with a fast shutter speed so reflections turn into crisp points of texture. If glare still feels messy, drop exposure by 1 to 2 EV or go black and white. Suddenly, chaos looks composed. At places like Waimea Bay, tropical shoreline light can make flare feel vivid rather than harsh.
Frequently Asked Questions
Can Smartphone Cameras Reduce Beach Glare as Effectively as DSLRS?
Yes, you can reduce beach glare nearly as well with a modern smartphone, but smartphone limitations matter: sensor size restricts highlight recovery, while computational photography helps balance reflections; DSLRs still give you more consistent control.
Do UV Filters Help Prevent Glare in Beach Photography?
No, why expect UV filters to stop beach glare? You won’t get polarizing benefits; filter myths confuse protection with reflection control. Coating differences may reduce flare, but you’ll need a circular polarizer for real glare reduction.
How Do I Protect Camera Gear From Salty Beach Air?
Protect your camera gear with sealed bags, silica packets, and lens caps near surf. Rinse everything with fresh water afterward, dry it completely, avoid changing lenses on the beach, and store it dry indoors later.
Can Post-Processing Fix Glare in Overexposed Beach Photos?
Absolutely, you can work miracles on mild glare: use highlight recovery, selective desaturation, and local contrast to restore detail. But you can’t recover fully clipped whites, so you’ll need cloning or exposure blending sometimes instead.
What Clothing Colors Photograph Best on Bright Beach Days?
Choose pastel tones, soft beige, navy, coral, and olive; you’ll photograph beautifully on bright beach days. Use contrast blocking for definition, avoid whites with glossy finishes, and skip tiny patterns so your skin stays balanced.
Conclusion
You don’t have to fight the beach to get clean photos. Shoot early at dawn or wait for clouds. Turn your body so the sun stays off your lens, add a polarizer, and watch the water calm down like glass after a breeze. Check your exposure, move your subject into shade, and change angles when reflections creep in. Soon you’ll hear waves, feel warm sand, and come home with bright shots instead of washed-out glare.